Some birthdays call for a card. Some call for a cake. And some — the big, milestone ones — call for something you pour your whole heart (and a whole lot of hours) into. This quilt was that project.
When my daughter hit her milestone birthday, I knew I wanted to make her something truly special. Something she could hang on her wall and look at for years to come. Something bright, playful, and completely one-of-a-kind. So I sat down at my Bernina embroidery machine and got to work.
The Scope of the Project
Let’s talk numbers first, because this quilt was a lot:
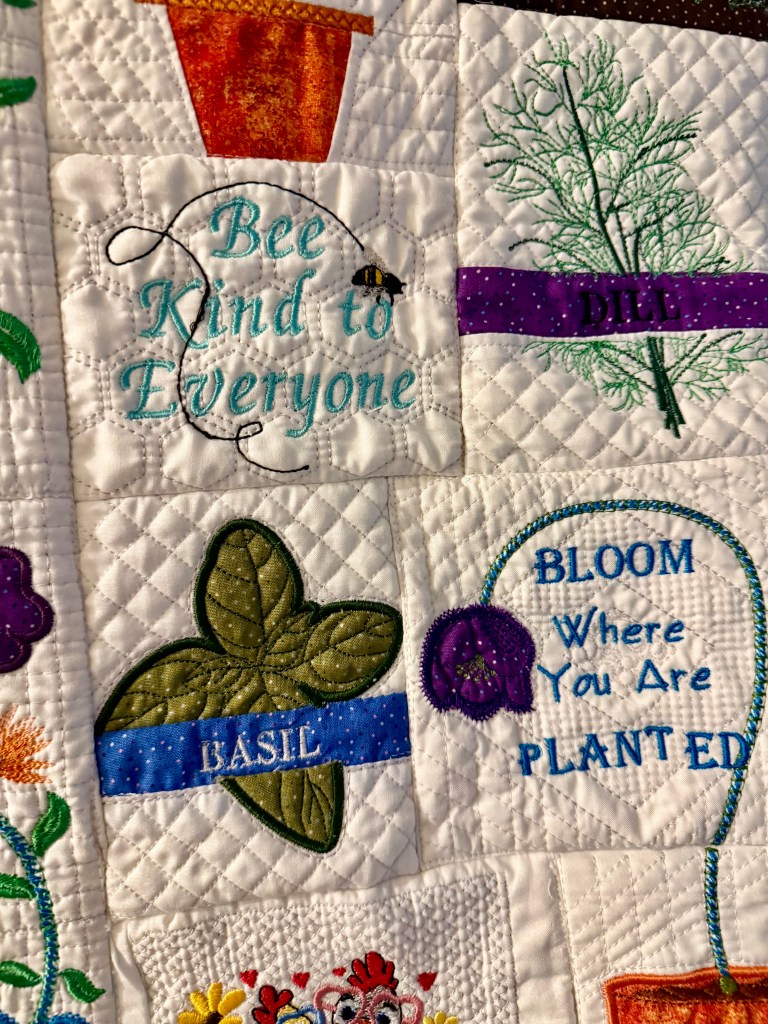
- 36 embroidered blocks, each one unique
- ~1 hour per block on average — so yes, roughly 36+ hours of embroidery alone
- Plus time for trimming, assembling, sewing blocks together, adding the border, backing, and binding
This is a wall hanging, not a bed quilt, but don’t let that fool you — it was every bit as labor-intensive as any full-size quilt I’ve made. Every hour was worth it.
The Embroidery Process: Appliqué the Fun Way
Many of the blocks feature fabric appliqué, and the process for achieving clean, crisp results is one of my favorites. Here’s how it works, step by step:
Step 1: Rough Cut I start by laying a rough-cut piece of fabric over the embroidery area in the hoop. It doesn’t have to be perfect — just bigger than the shape I need.
Step 2: The Machine Sews the Shape The Bernina stitches around the exact outline of the appliqué shape, tacking the fabric down.
Step 3: Pull & Trim I remove the hoop from the machine (without taking it out of the hoop!) and trim the fabric right down to the stitched edge. This is where precision pays off — a sharp pair of embroidery scissors is your best friend here.
Step 4: Back to the Machine for the Satin Stitch Once trimmed, I pop it back on the machine and it lays down a beautiful satin stitch all the way around the newly cut edge. This covers any raw fabric, gives a polished finish, and adds that signature look that makes appliqué so satisfying.
Special Techniques Worth Talking About
The Rain Boots: A Clear Plastic Overlay
One of my favorite details in this quilt is the rubber rain boots block. To give them that shiny, rubbery look, I used a clear plastic overlay on top of the fabric before the final stitching. It’s a small touch, but it creates a wonderful dimensional, glossy effect that really makes the boots look like actual rain boots. So fun!
The Bird Tail Feathers: Fluffy Loop Fringe
This one got a lot of “how did you DO that?!” when I showed people the finished quilt. It’s one of those techniques that sounds complex but is deeply satisfying once you get the hang of it.
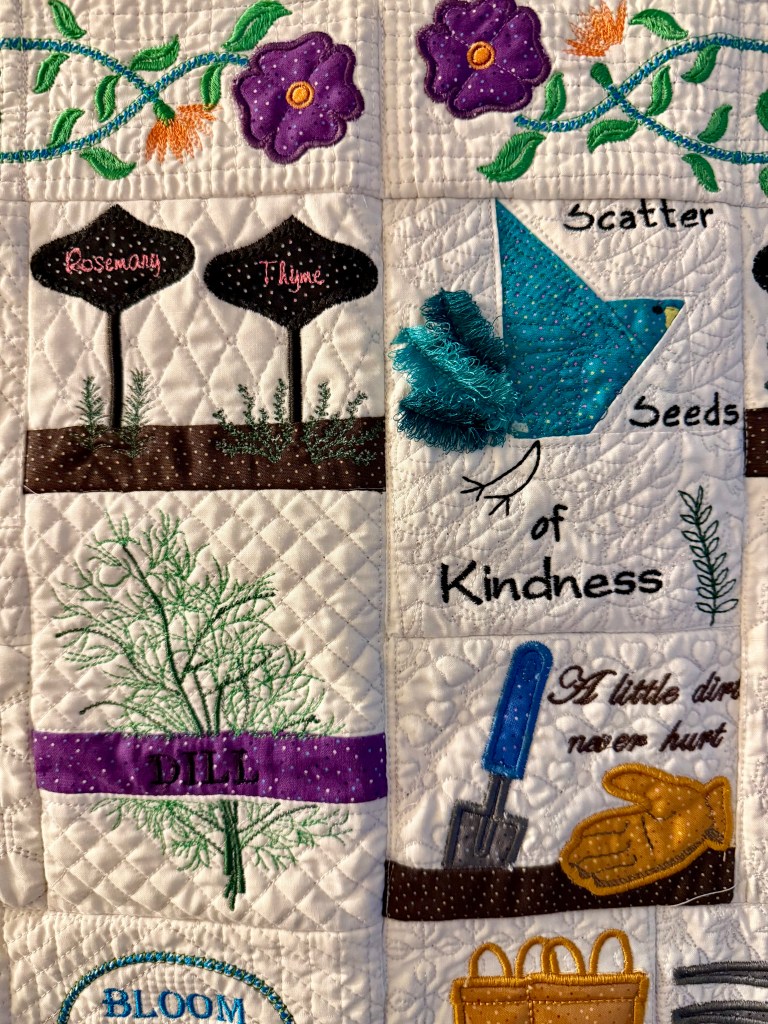
For the tail feathers on the birds, I created loop fringe:
- The machine makes loops with the thread as it stitches.
- Once the stitching is done, I carefully trim one side of each loop.
- This frees the threads into a soft, fluffy fringe that looks just like real feathers.
It’s textural, it’s dimensional, and it adds SO much life to the birds. You have to touch it — it feels as fluffy as it looks!
Putting It All Together
Once all 36 blocks were embroidered, the assembly process began:
- Flip and trim the batting away from the seam allowances on the back of each block — this reduces bulk and makes sewing the blocks together much cleaner.
- Sew the blocks together into rows, then join the rows.
- Add the flower border, which is made from fabric (using the same appliqué technique described above) and frames the whole quilt in the brightest, happiest way.
- Sew on the backing and finally, add the binding to finish all the edges.
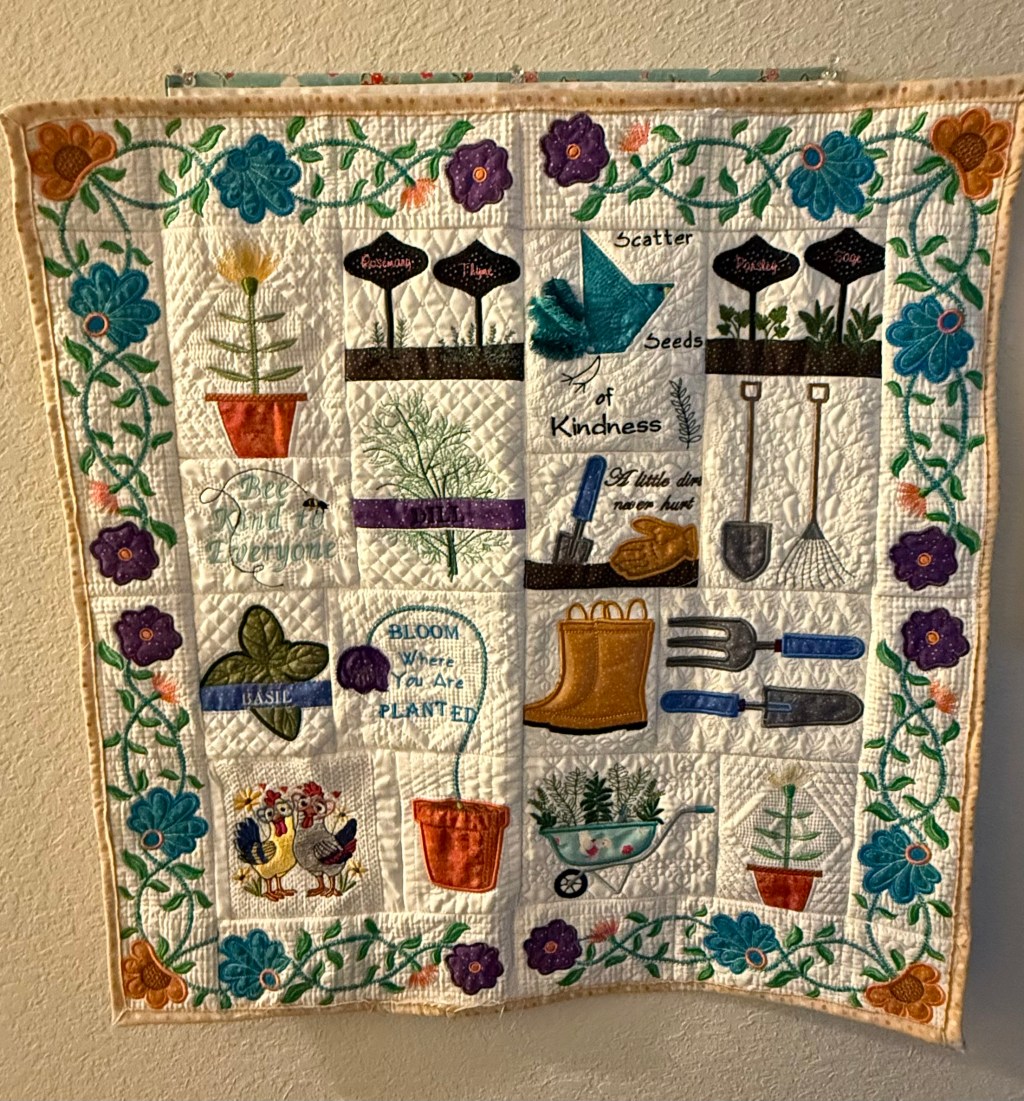
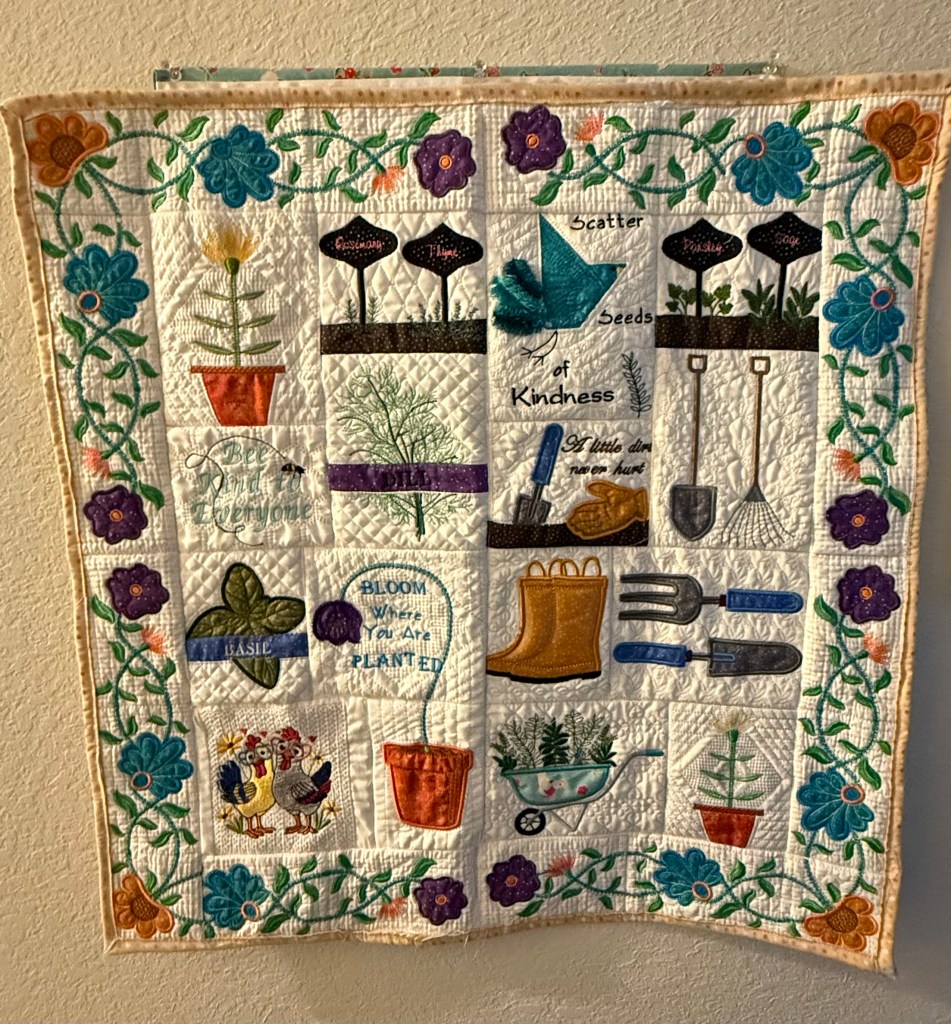
The Finished Result
A bright, playful, utterly personal wall hanging — 36 blocks of love, one for every year… well, not quite, but it felt that way by the time I finished!
This quilt isn’t going to keep anyone warm on a cold night. But it will hang on a wall and tell a story — of a mama who wanted to make something extraordinary for a daughter hitting a big milestone. And I think that’s the best kind of quilt there is.

Leave a comment